Seasonal allergies are the WORST! Unfortunately, allergy season is in FULL SWING in Texas! This means all of those fun allergy symptoms like itchy eyes, sore throat, and trouble breathing pop up in my daily life. This time of year I literally hide myself away inside the house which I hate because the weather is so nice!
One of the things that seriously triggers my allergies is when the grass is mowed. I know that it’s necessary to mow, but it just kills me! Recently, my sister mentioned that it would be easier on her allergies when she mows if she could wear a mask. Once she told me this all of my creative juices started flowing! Anyone who knows me knows that all you have to do to get me to make something is suggest it (I’m a total crafting geek). So, I dug through all of my material and found the cutest fabric for her. This mask is super easy and only took me 30 minutes to make!
This post contains affiliate links. That’s just a fancy way of saying if you click on a link and purchase something I get a little money (total score for me). For more information, see my disclosure here.
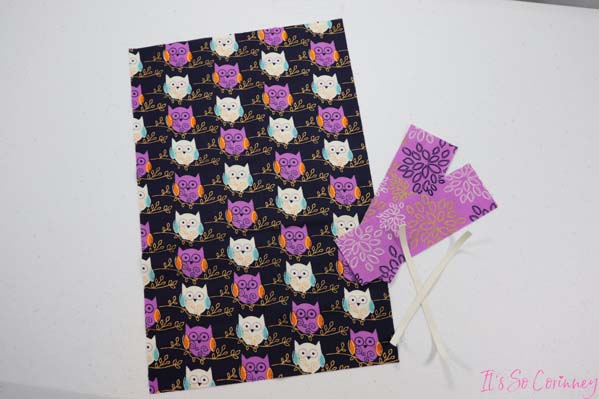
What You Need!
- 1/4 Inch Elastic
- Quilting Cotton ~ 2 Colors
- Matching Thread
- Free #7 ~ Face Mask Printable Pattern ~ Available in The Pattern Stash! Head on down to the bottom of the page, fill out the form, and instantly receive an email with the password!
Important Info!
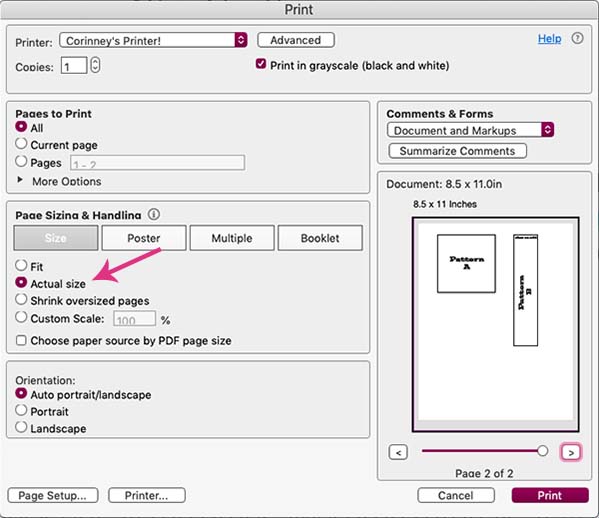
When printing the sewing pattern PDF make sure to adjust the print settings. After you click on the print button in the PDF the printer dialog box will come up. On this screen you want to change the default zoom page size to be Actual Size. If you don’t change this setting then the pattern will print smaller then intended (so sad!).
What To Cut!
- (2) 6 Inch Elastic Strips
- (1) Rectangle from Fabric A
- (2) Strips from Fabric B
FYI!
All sewing is done with a 1/4 inch seam allowance. I used my rotary cutter (which I love!) to cut the fabric pieces which made cutting super fast!
What To Do!
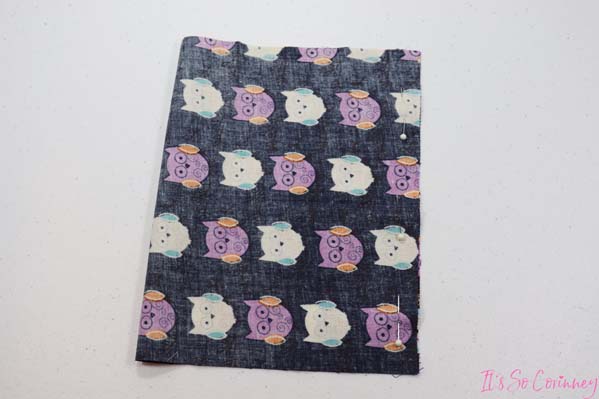
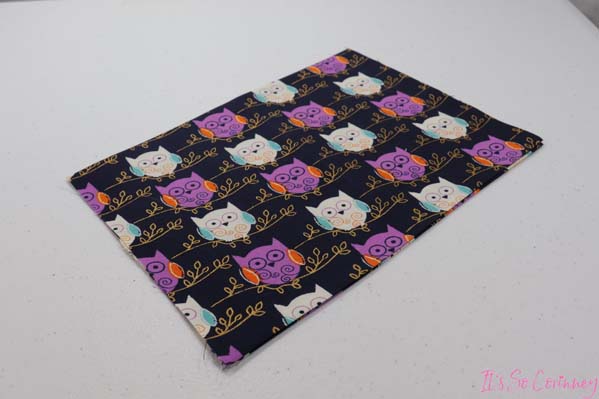
Firstly, fold the rectangle right sides together matching up the two 9 inch sides.
Then sew together to make a tube.
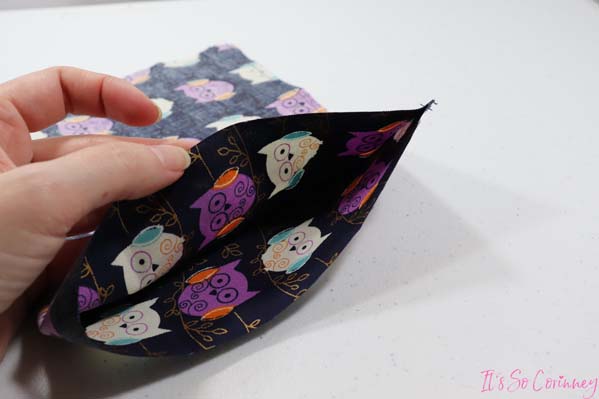
Flip the tube right side out.
Then press the DIY face mask while making sure that the seam is at the bottom.
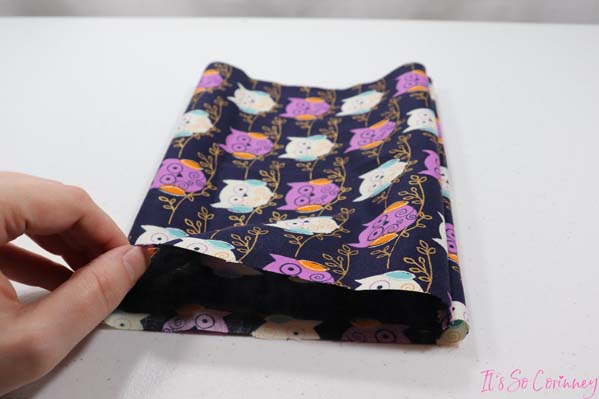
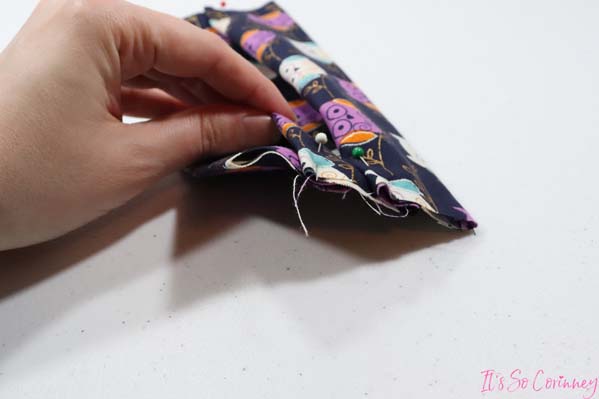
So, on to making the pleats! The first pleat measures 1 3/4 inches from the bottom of mask, 2nd pleat measures 1 1/2 inches, and top section of the mask measures 1 3/4 inches.
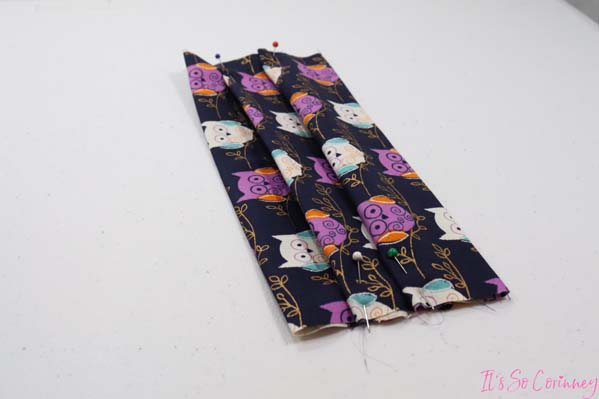
Then pin the pleats on both sides of the face mask and press with iron.
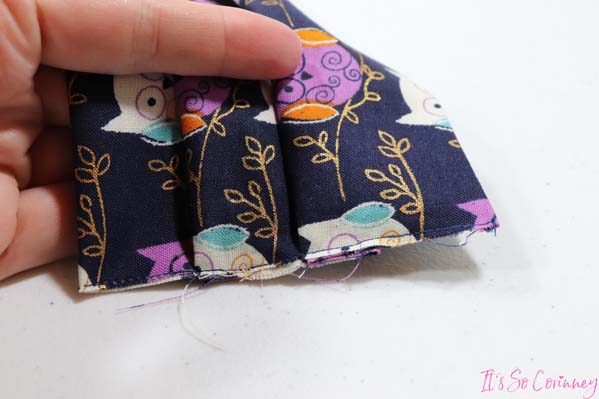
Next, baste stitch the pleats so they don’t move.
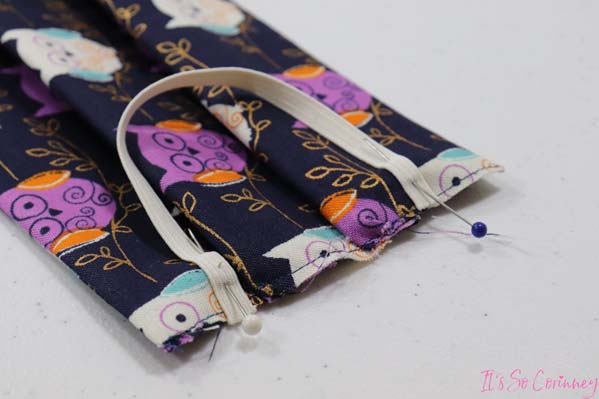
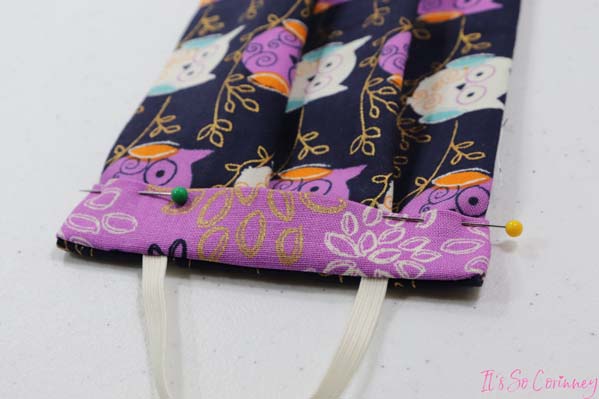
Then pin the elastic to the back of your face mask. I sewed both of the elastic pieces 1/2 inch away from either outside edge of the face mask. For example, the blue pin is 1/2 inch from the right side edge of the face mask and the white pin is 1/2 inch from the left side edge.
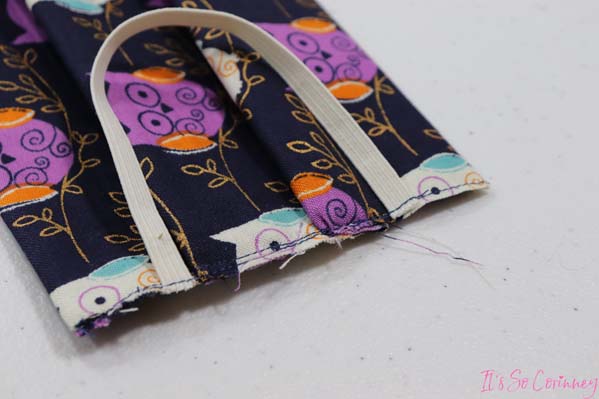
Baste stitch the elastic to back of face mask. Then…..STOP! You need to try on your mask (very carefully) and see if it’s tight enough. If it’s too loose then you need to seam rip one of the elastic sides and cut the elastic shorter.
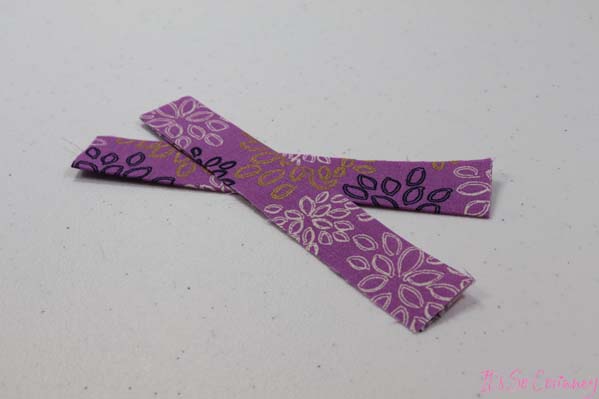
Then press the two trim strips making the 6 inch sides touch each other.
FYI! Did you know you can get a printer friendly PDF of the DIY face mask tutorial that prints without ads? Just head over to The It’s So Corinney Shop and check it out!
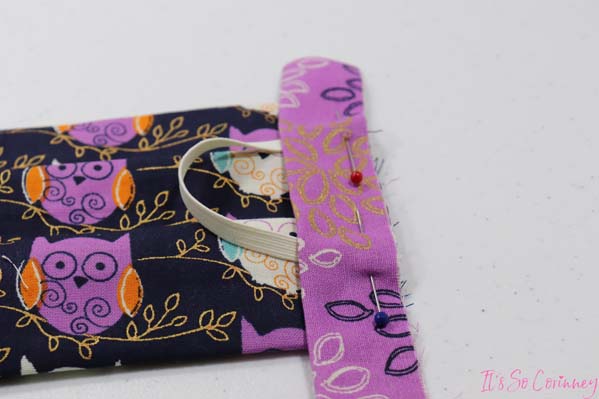
Pin the raw edge of the trim to the raw edge of the face mask. The trim goes right on top of the elastic on the back side of the face mask.
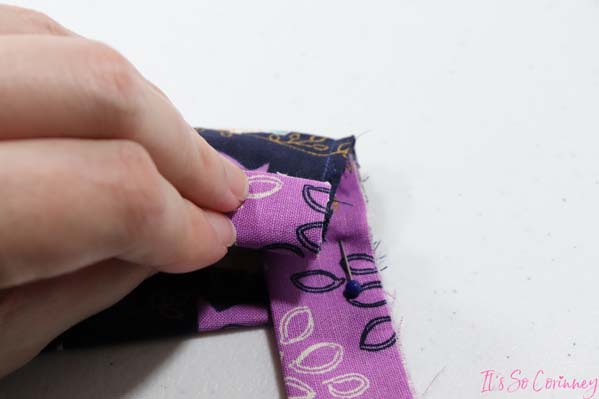
Then fold both the ends of the trim to the front side of the face mask and pin.
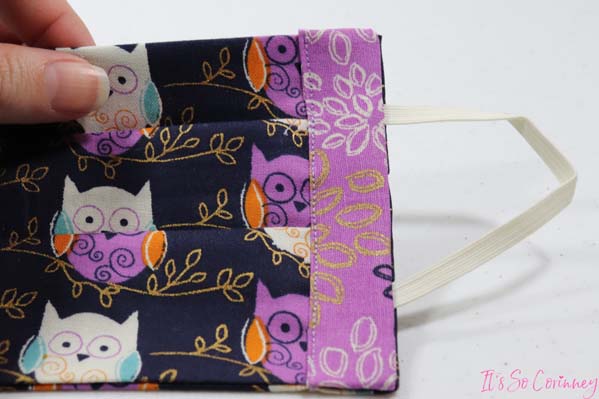
Sew the trim down while making sure to catch the two ends that you folded to the front.
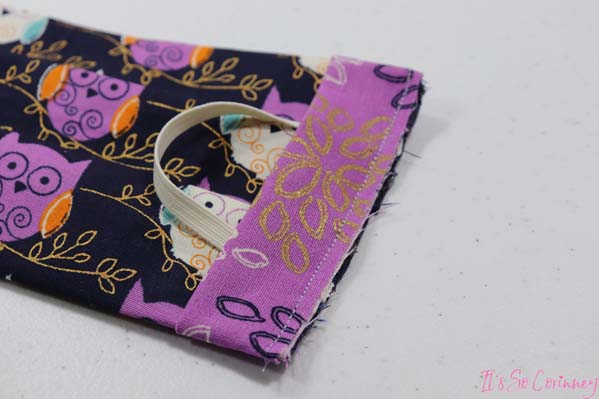
So, if everything went as planned this is what the back of the face mask will look like after you have sewn the trim down.
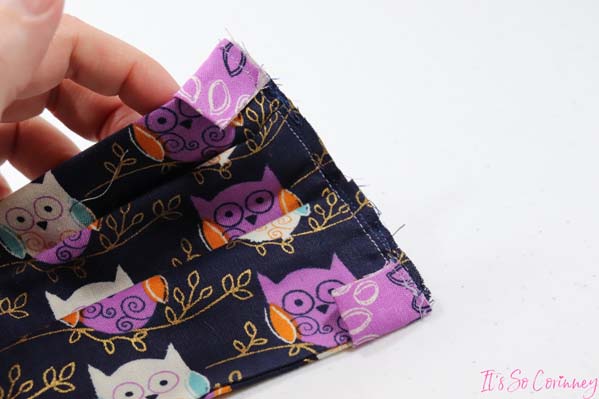
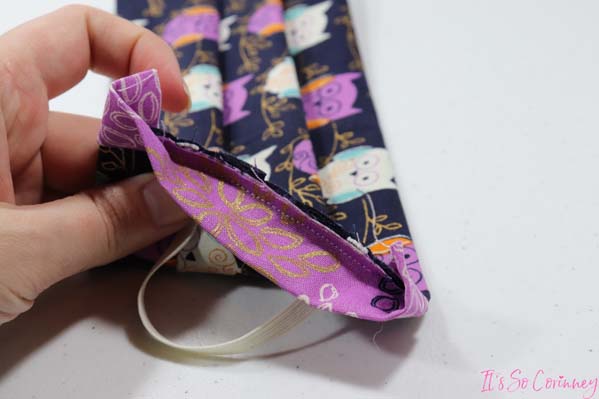
Then unfold the trim and fold over towards the front of the face mask. Press the trim with an iron.
Pin the trim to the front of the DIY face mask.
Then do a straight stitch down the side of the trim.
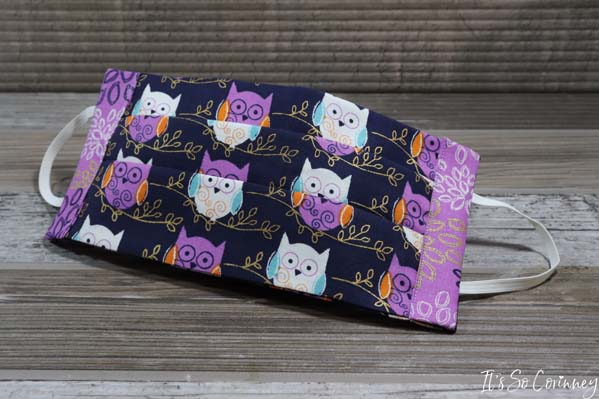
Repeat the trim steps to do the other side of the face mask. Then….. you are all done!
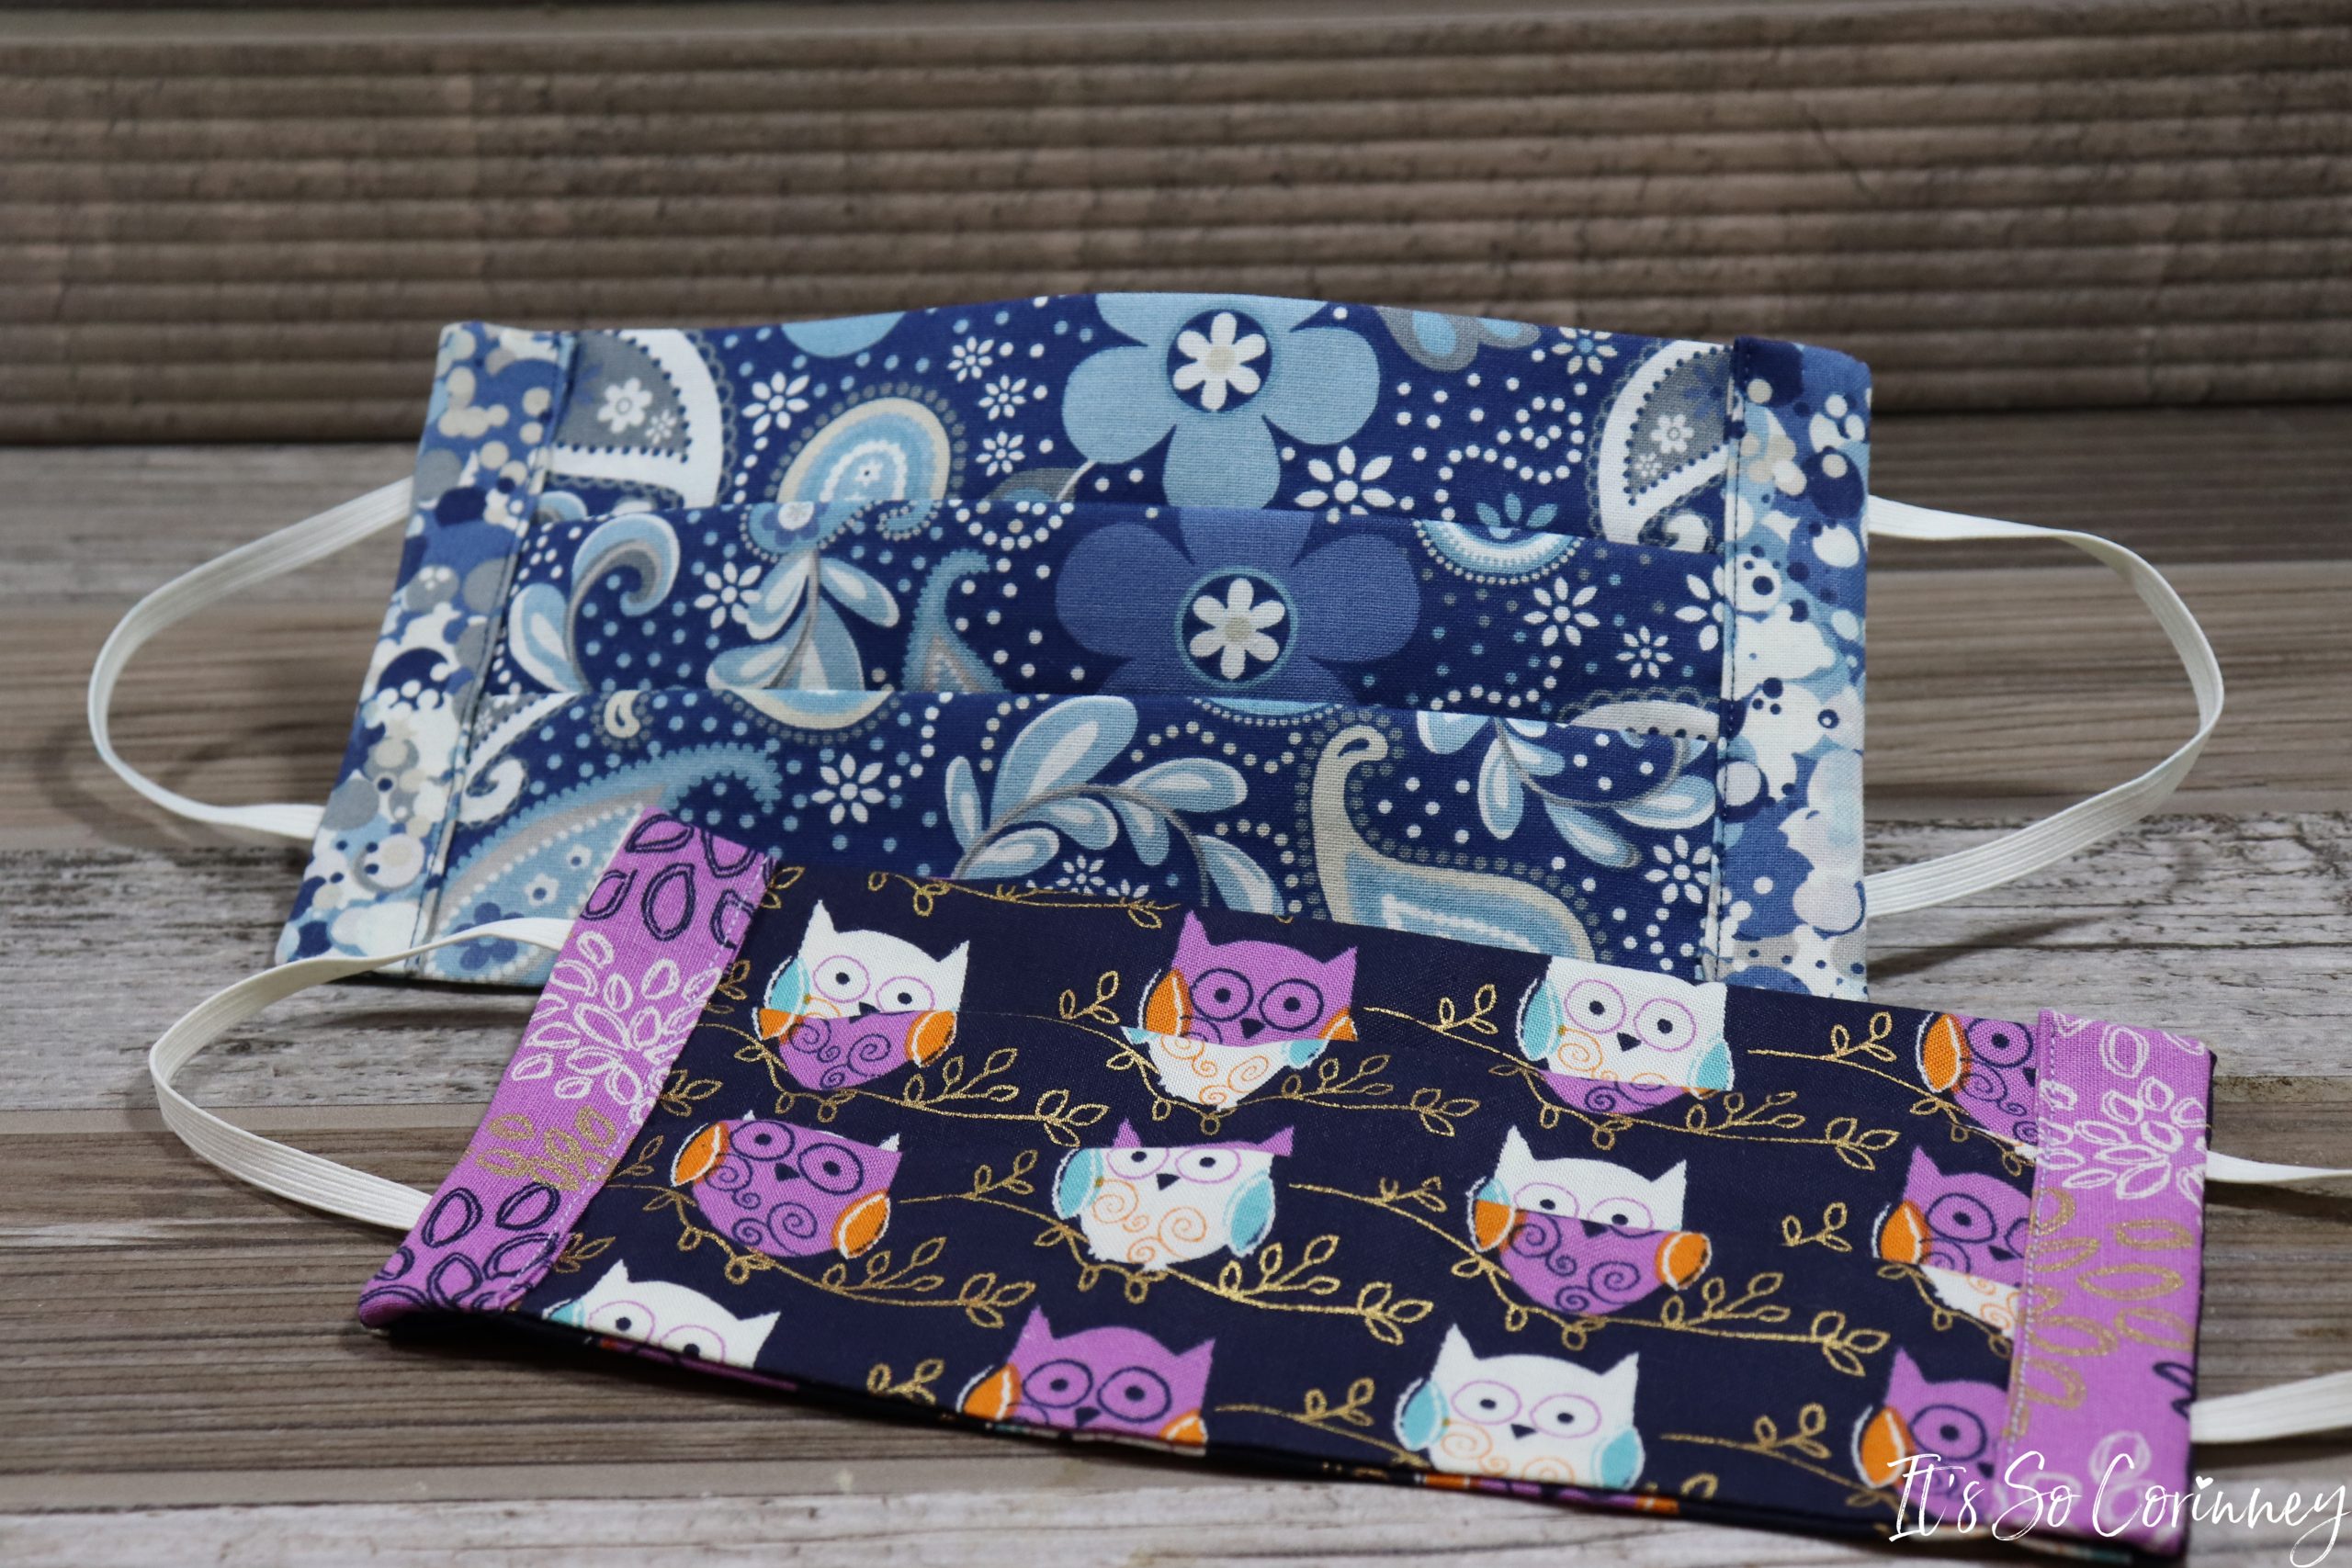
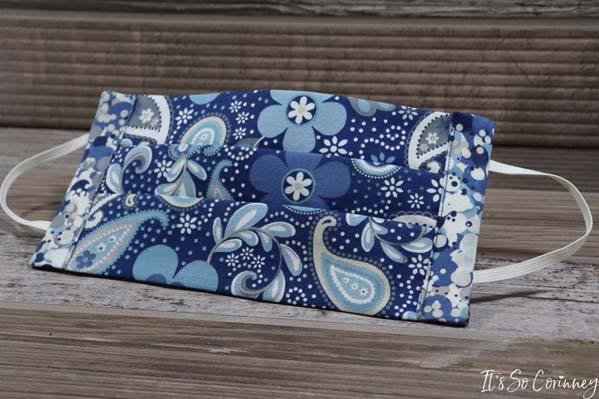
Here is another face mask that I did in a blue floral.
This easy DIY face mask can be easily made from scraps (which is what I did) and can be made in 30 minutes! So, for whatever reasons you need or want to wear a face mask I hope this tutorial helps you!
Would you like a printer friendly PDF of the DIY face mask tutorial that prints without ads? Then head over to The It’s So Corinney Shop!

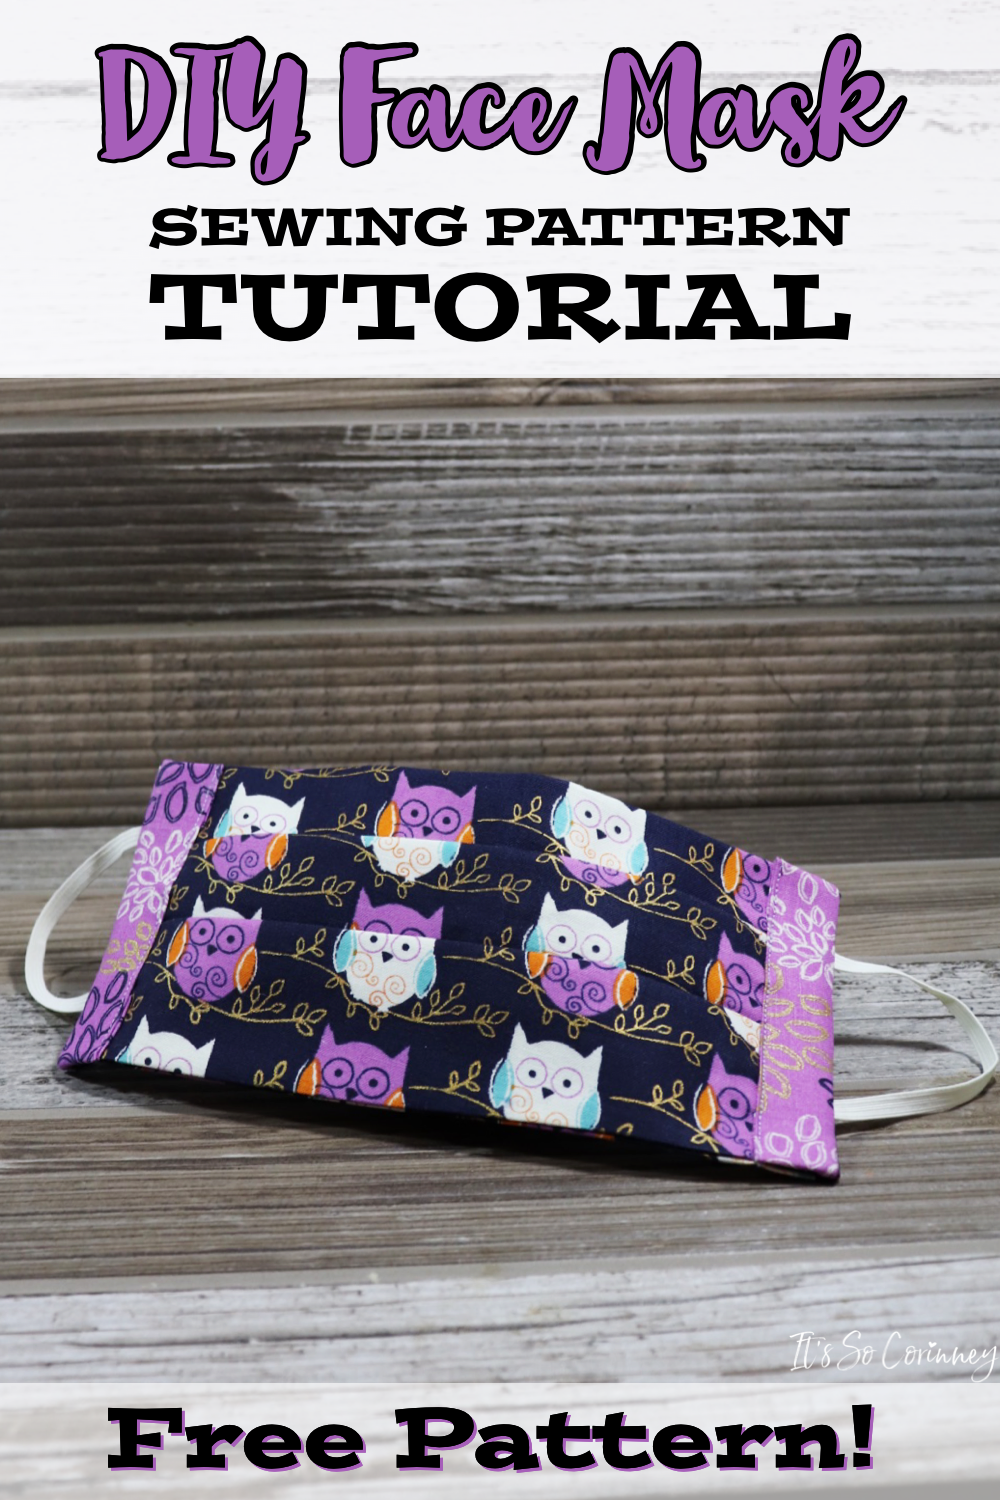
Pin Me!
Want To Up Your Sewing Skills?
Are you ready to stop putting off sewing projects and gain confidence in sewing? This instant download digital book comes with over 50 pages of sewing knowledge to help you gain confidence in your sewing! Also included is 5 bonus printable sheets to help you keep your sewing projects and supplies more organized!
Love The Craft Tutorials On The Blog?
Do you enjoy the craft tutorials on the It’s So Corinney blog? If so, would you consider leaving a tip to help me keep the blog going? Your generous support would help me purchase more craft supplies and caffeinated products to create new and exciting craft tutorials to share with you!

Thank you for sharing Really nice Well done I hope I can sew these
Joanne
You’re very welcome!
These are awesome, you did a really nice job. I’m going to give it a try tomorrow! Thanks!
Thank you!
Late in the game but was sick for 3 weeks with this world wide virus and don’t want to get it again! Making a couple for myself as well as my honey! Thank you!
I’m glad your doing better!
From everything I’ve read and seen online about the face masks, the pleats are supposed to face down. However, in your tutorial, they are facing upwards.
Hi Kim! If you want your pleats to go down you could just switch the direction of the print of your fabric at the beginning. Then follow the directions as normal. I hope this helps!
What are the sizes for kids?
Thank you for this great tutorial! It helped me a lot!
I’m so glad you liked the tutorial! Unfortunately, I didn’t make any masks for kids only adults. If I were you I would start with a piece of fabric 7×12 and before you start adding the side trim hold it up to their face and see if you need to trim it down. This is what I had to do because the 9 inches across was too big for my narrow face so I made my main piece 8 3/4 inches wide.
Thank you!
Thanks so much. I was trying to find an attractive and easy way to sew the elastic. When I read your tutorial, there was a big Ah ha moment.
You’re so welcome!
Love the way you finished the ends with the trim pieces. I make masks, but didn’t know how the attach the elastic with finished ends. Thanks for sharing, and with pictures. Great owl material, and colors.
You’re welcome! I’m so glad the tutorial helped you.
Cute masks! Love the idea!!
Thank you!
How we are the pleats?
Hi! The pleats are approximately 3/4 inch deep. Of course you could totally make bigger/smaller pleats if you wanted.
cute mask
Thank you!
Thank you for adding me, I am interested in making a mask or two.
You’re welcome!
Hi, great job! Where did you get this owl fabric from?
Thank you! The owl material was bought at Joann Fabric but it was a long time ago.
I would like to have your face mask pattern. Thanks.
I’m so glad you like the face mask! To get the pattern you just have to sign up with one of the forms on this page and you will instantly get an email with the password to The Pattern Stash.
Looks simple enough, I am going to give it a go this weekend. Thank you so very much for sharing, and the pictures helped so very much!!
You’re so welcome!
This is a very nice pattern. Well done. I’m anxious to try it. I have two children and a son in law that are all first responders, or in the medical field. Thank you!
I’m so glad you like it! Tell you children thank you for all they do!
How do I print a pattern? I could not find a link that didn’t need a code.
All you have to do is fill out one of the signup forms on this page and you will get the password to The Password Stash.